
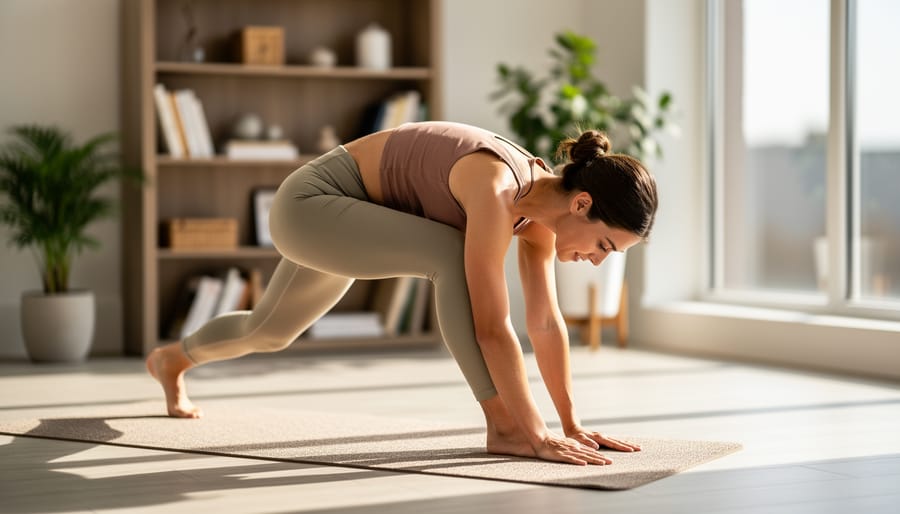
Yes, yoga absolutely improves flexibility for beginners, and you can see measurable progress in as little as two to four weeks with consistent practice. You don’t need to touch your toes on day one. The beauty of yoga is that it meets you exactly where you are, using controlled stretches, mindful breathing, and progressive poses to safely lengthen tight muscles and increase your range of motion over time.
If you’ve been putting off trying yoga because you think you’re “too stiff,” you’re actually the perfect candidate. Limited flexibility is precisely why many people start yoga in the first place. Unlike bouncing through stretches at the gym or forcing your body into uncomfortable positions, yoga teaches you to work with your natural structure, honoring tight hamstrings, locked hips, and tense shoulders without judgment.
The key is knowing which poses deliver the biggest flexibility gains for beginners and how to perform them safely. Certain foundational stretches target the muscle groups that restrict most people: hip flexors, hamstrings, lower back, and shoulders. When practiced in a deliberate sequence with proper form, these poses create lasting change in your body’s mobility.
This guide walks you through everything you need to build flexibility through yoga. You’ll learn what minimal equipment makes practice more comfortable, how to avoid common beginner mistakes that lead to injury, and a complete follow-along routine you can start today. Whether you’re a man who’s never stretched a day in your life or a woman returning to movement after years away, you’ll find a clear path forward.
What You Need to Start Your Flexibility-Focused Yoga Practice
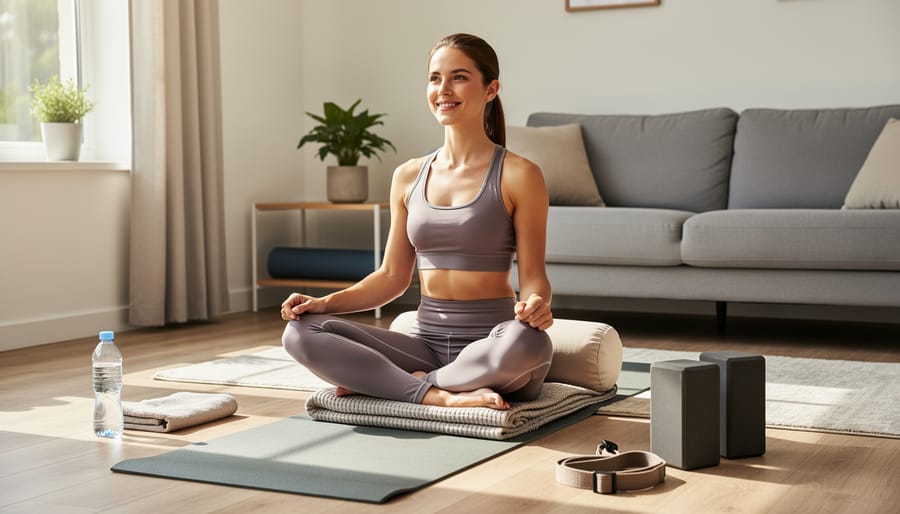
You can start building flexibility through yoga with very little equipment. A few basic items will make your practice safer and more comfortable, but you don’t need to spend a fortune before your first session.
Essential Items:
- Yoga mat (essential), Provides cushioning and prevents slipping during poses; a 4-6mm thickness works well for beginners
- Comfortable, stretchy clothing (essential), Fitted enough to see your alignment but with full range of motion; avoid baggy clothes that bunch up in forward folds
Helpful Additions:
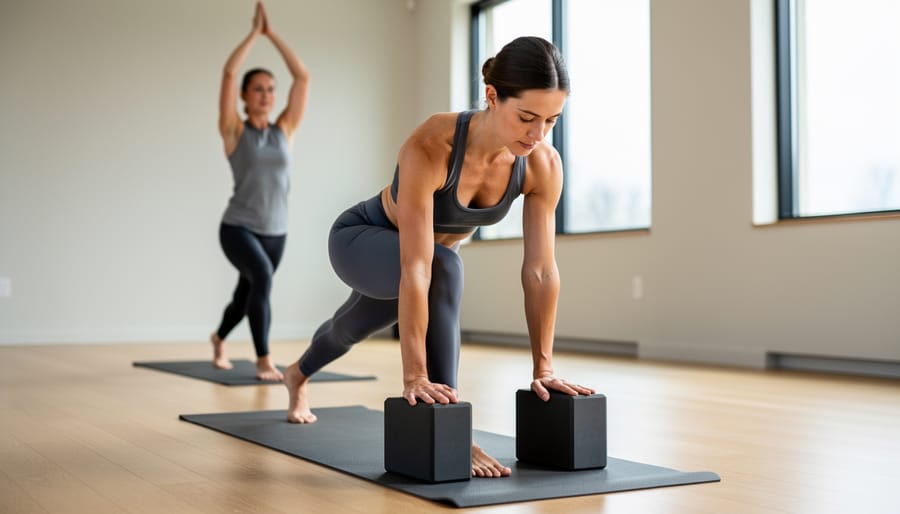
- Yoga blocks (highly recommended), Bring the floor closer to you in poses where flexibility is limited; most beginners benefit from having two blocks
- Yoga strap (highly recommended), Helps you reach your feet or hold poses without straining; a belt or resistance band works as a substitute
- Bolster or firm cushion (optional), Supports your body in restorative poses and seated positions; a rolled blanket or stacked pillows serve the same purpose
- Blanket (optional), Provides extra padding for knees and adds warmth during final relaxation
If you’re hesitant to buy specialized gear right away, household items work surprisingly well. A non-slip towel on carpet can replace a mat temporarily, though it offers less cushioning. Thick hardcover books stacked to the right height substitute for blocks. The key is having something that prevents slipping and supports your body where flexibility is still developing.
Women often find blocks particularly useful for hip-opening poses, while men frequently need straps for hamstring stretches. Start with the essentials and add props as you discover which poses challenge you most.
Safety Considerations Before You Begin
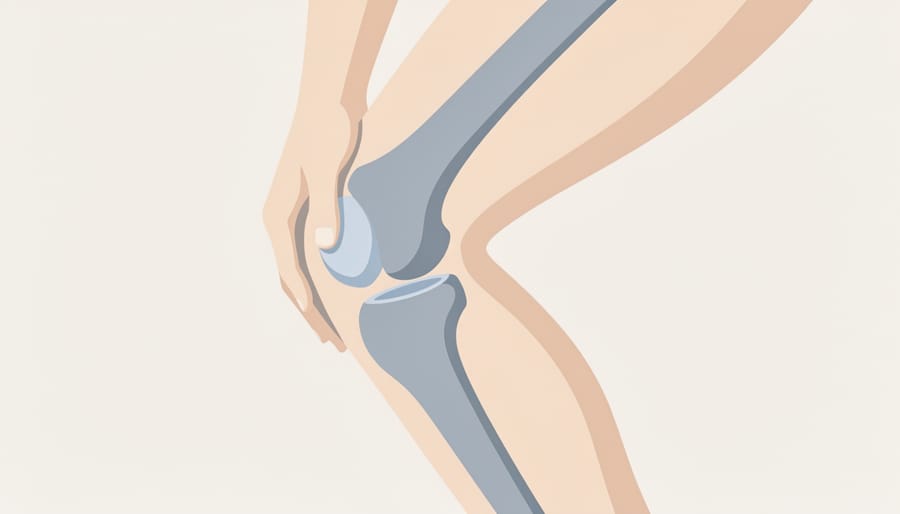
Before you roll out your mat, understanding a few essential safety principles will protect you from injury and help you build flexibility the right way. These guidelines aren’t about holding you back, they’re about ensuring your practice remains sustainable and enjoyable for the long term.
Always begin with a proper warm-up. Cold muscles resist stretching and are far more prone to strains. Spend 5-10 minutes doing light movement like walking in place, gentle arm circles, or the warm up steps that gradually increase your heart rate and body temperature. This preparation makes your connective tissue more pliable and responsive to stretching.
Never force your body into a position or use momentum to bounce in and out of stretches. Ballistic stretching, that bouncing motion, can trigger your muscles’ protective reflex, causing them to tighten rather than lengthen. Instead, move slowly into each pose and hold steady. Research on length and frequency of stretching shows that controlled, sustained holds are what produce genuine flexibility gains.
Your body communicates constantly during yoga. Productive stretching feels like gentle tension that gradually softens with each breath. Pain, however, feels sharp, pinching, or causes you to hold your breath. If you experience the latter, back off immediately. Respect your current limits, flexibility develops through consistent gentle practice, not by pushing past your edge.
If you have pre-existing injuries, joint problems, or conditions like arthritis or herniated discs, consult your healthcare provider before starting. Many poses can be modified to work around limitations, but professional guidance ensures you choose appropriate variations. Women experiencing pregnancy should seek prenatal-specific yoga instruction, as certain poses require adjustment during this time.
Remember that everyone’s starting point differs based on genetics, activity history, and age. There’s no race. Building flexibility is a personal journey that rewards patience far more than aggression.
Foundational Yoga Poses That Build Flexibility
Upper Body and Spine Flexibility Poses
Your upper body holds tension from daily life, hunching over screens, carrying bags, even stress itself. These three poses systematically release that tightness while building flexibility through your chest, shoulders, and entire spine.
Cat-Cow (Marjaryasana-Bitilasana) warms up your spine with gentle movement. Start on hands and knees with wrists under shoulders and knees under hips. Inhale as you drop your belly, lift your chest, and gaze forward (Cow). Exhale as you round your spine, tuck your chin, and draw your navel toward your backbone (Cat). Flow between these positions for 8-10 breaths, moving with your breath rather than rushing. This dynamic stretch improves spinal mobility in both directions and relieves back stiffness.
Child’s Pose (Balasana) stretches your spine, shoulders, and hips simultaneously. Kneel with big toes touching and knees apart, then sit back on your heels and extend your arms forward, forehead resting on the mat. If your hips don’t reach your heels, place a folded blanket between them. Walk your hands slightly right, then left, to target different areas of your back. Hold for 1-2 minutes, breathing deeply into your ribcage.
Thread the Needle opens tight shoulders and upper back. From hands and knees, slide your right arm under your left, lowering your right shoulder and ear to the floor. Your left hand can stay planted or reach forward for a deeper stretch. Hold 45-60 seconds per side. This twist releases shoulder tension that limits your range of motion in daily activities.
Lower Body Flexibility Poses
The lower body often holds the most stubborn tightness for beginners, especially in the hips and hamstrings where hours of sitting create deep tension. These four poses systematically target every major muscle group from your waist down.
Low Lunge opens your hip flexors and quads while gently stretching the hamstring of your front leg. Step your right foot forward between your hands, keeping the knee stacked over your ankle. Let your left knee rest on the mat (use a folded blanket underneath for comfort) and untuck the back toes. Gently press your hips forward and down until you feel a moderate stretch in the front of your left hip. Keep your torso upright and hands on your front thigh for balance. Hold for 45-60 seconds, then switch sides. If your hips are very tight, keep your hands on blocks beside your front foot instead of lifting your torso fully upright.
Butterfly Pose targets inner thigh and hip flexibility. Sit with the soles of your feet touching and knees falling out to the sides. Bring your heels as close to your body as comfortable, closer increases intensity, farther away reduces it. Hold your feet or ankles and sit tall, lengthening your spine. Let gravity do the work rather than pushing your knees down. Stay here for 60-90 seconds, breathing deeply. Your knees might be quite high off the ground initially, and that’s perfectly normal.
Seated Forward Fold addresses hamstring tightness directly. Sit with legs extended straight in front. Flex your feet, engaging your thighs. Hinge at your hips (not your waist) and reach forward, letting your hands rest on your shins, ankles, or feet, wherever they land without rounding your back excessively. The goal isn’t touching your toes; it’s maintaining length in your spine while feeling the stretch along the backs of your legs. Bend your knees slightly if your hamstrings are very tight. Hold for 60-90 seconds.
Downward Dog combines hamstring and calf stretches while opening your shoulders. Start on hands and knees, then lift your hips up and back, forming an inverted V-shape. Keep your hands shoulder-width apart, fingers spread wide. Pedal your feet one at a time, bending one knee while straightening the other leg to gently stretch each calf and hamstring. Don’t worry about getting your heels to the floor, bent knees with a long spine beats straight legs with a rounded back. Hold for 45-60 seconds, continuing to pedal or finding stillness.
Full-Body Integration Poses
Full-body integration poses bring together everything you’ve practiced so far, stretching multiple muscle groups while improving your overall body awareness. These movements flow naturally and prepare you for complete yoga sequences.
Supine Twist releases tension throughout your entire spine while opening your chest and hips simultaneously. Lie on your back, draw your right knee toward your chest, then guide it across your body to the left side. Extend your right arm out to the side and turn your head right. Your left hand can gently rest on your right knee, no pushing required. Hold for 60-90 seconds, feeling the twist from your lower back through your shoulders. Switch sides. This pose is particularly effective after a workout when your muscles are warm.
Standing Forward Fold stretches your hamstrings, calves, hips, and lower back in one fluid movement. Stand with feet hip-width apart, hinge at your hips, and let your upper body hang heavy. Bend your knees generously, straight legs aren’t the goal here. Let your head and neck relax completely. Hold opposite elbows if that feels comfortable, creating gentle traction through your spine. Stay for 45-60 seconds, breathing deeply into your back body.
Your Step-by-Step Beginner Flexibility Routine
This complete beginner routine requires nothing more than your mat and 25 minutes. You’ll move through a logical progression that warms your body safely, builds flexibility in key areas, then brings you back to stillness. Practice this sequence 3-4 times per week, ideally on non-consecutive days to let your body adapt.
Before you begin, read through the full sequence once so you understand the flow. Keep a glass of water nearby and remember: never force yourself deeper into a pose. Your breath should remain smooth and steady throughout, if you’re holding your breath or gasping, you’ve pushed too far.
- Warm-Up: Breathing and Gentle Movement (5 minutes)Start in a comfortable seated position with your legs crossed. Close your eyes and take 10 deep breaths, inhaling through your nose for a count of four, exhaling for six. This primes your nervous system for safe stretching. Move into Cat-Cow on hands and knees: inhale as you arch your back and lift your chest (Cow), exhale as you round your spine and tuck your chin (Cat). Flow between these positions 15 times, syncing one breath to one movement. Finish by sitting back into Child’s Pose for five breaths, arms extended forward, forehead resting on your mat.
- Standing Flexibility Poses (8 minutes)Rise to standing and perform 5 gentle neck rolls in each direction. Stand tall and reach both arms overhead, then fold forward from your hips into a Standing Forward Fold, letting your head hang heavy. Bend your knees generously, this isn’t about touching your toes yet. Hold for 10 breaths, swaying gently side to side. Step your right foot back into a Low Lunge, dropping your back knee to the mat. Keep your front knee over your ankle and sink your hips forward, feeling the stretch through your right hip flexor. Hold for 8 breaths. Step forward to a fold, then repeat the lunge on your left side. Return to standing and transition to Downward Dog, holding for 8 breaths while pedaling your feet to stretch each calf individually.
- Seated and Floor Poses (10 minutes)Sit on your mat with legs extended in a Seated Forward Fold. If your hamstrings are tight, sit on a folded blanket and keep a slight bend in your knees. Reach forward from your hips (not your lower back) and hold wherever you land for 12 breaths. Move into Butterfly Pose by bringing the soles of your feet together, knees falling out to the sides. Use your elbows to gently press your thighs toward the floor, no bouncing, and fold forward slightly. Hold for 10 breaths. Extend your right leg and fold over it for 8 breaths (modification: keep knee bent), then switch to your left. Finish this segment with a Supine Twist: lie on your back, hug your knees to your chest, then drop both knees to the right while extending your arms out to the sides. Hold for 8 breaths, then switch sides.
- Cool-Down and Final Relaxation (5 minutes)Lie flat on your back with arms at your sides, palms facing up, legs extended or knees bent if that’s more comfortable. This is Savasana, the final resting pose. Close your eyes and scan your body from head to toes, consciously releasing tension in your jaw, shoulders, hips, and feet. Let your breath return to its natural rhythm. Stay here for the full 5 minutes, this integration period is where your nervous system processes the work you’ve done and signals your muscles to adapt. When you’re ready to finish, wiggle your fingers and toes, roll to one side, then press yourself up to seated.
As you move through this routine, remember that the transitions matter just as much as the poses themselves. Move deliberately, and prepare before stretching by respecting the warm-up phase every single session. If a particular pose feels especially tight today, that’s information, not failure. Your flexibility will vary day to day based on sleep, hydration, stress, and activity level, this routine meets you wherever you are.
How to Track Your Progress and Know It’s Working
The most reliable way to track flexibility progress is through simple weekly check-ins using the same poses from your routine. Each week, return to Forward Fold, Butterfly Pose, and Low Lunge in the same conditions, after a warm-up, same time of day, and notice how far you can comfortably reach compared to the previous week. Take a quick photo from the same angle or jot down a note about depth and ease. You’re not chasing dramatic changes daily; you’re building a record that reveals gradual improvement over weeks.
Beyond measurement, pay attention to non-scale victories that signal real progress. Can you reach your toes in the morning when you couldn’t last month? Do you notice less stiffness when you get out of bed or after sitting at your desk? Is your posture improving naturally throughout the day? These everyday markers often appear before you see dramatic changes in your deepest stretches, and they confirm that yoga is working in your daily life, not just on the mat.
Realistic timelines help you stay motivated. Most beginners notice they can stretch regularly, two to three times per week and see tangible changes in range of motion within 3-4 weeks. Significant flexibility, touching your toes comfortably, deeper lunges, noticeably improved hip mobility, typically emerges around 2-3 months of steady practice. Plateaus are normal and often mean your body is consolidating gains; when progress seems to stall, focus on consistency over intensity rather than pushing harder.
You’re ready to advance your practice when poses that once felt challenging now feel accessible and you can hold them with steady breathing and good form. At that point, revisit your beginner yoga guide to explore deeper variations or longer holds, ensuring each step forward is earned through patience rather than force.
Common Questions About Yoga and Flexibility for Beginners
How often should I practice yoga to see flexibility improvements?
Aim for three to four sessions per week, each lasting 20 to 30 minutes. Consistency matters far more than duration, regular practice signals your body to adapt and lengthen tissues gradually, while sporadic intense sessions often lead to soreness without meaningful progress.
Can I really become flexible if I’ve always been stiff?
Absolutely. Natural stiffness is a starting point, not a permanent condition. Your muscles and connective tissues respond to gentle, repeated stretching regardless of your baseline flexibility, though your progress timeline may differ from someone who’s naturally looser.
Is it better to practice yoga in the morning or evening for flexibility?
Evening practice often feels easier because your body is warmed up from daily movement, making stretches more accessible. Morning yoga requires extra warm-up time but can reduce stiffness throughout the day, choose whichever time you’ll stick with consistently.
Should I expect to feel sore after yoga practice?
Mild muscle tenderness the next day is normal when you’re new to stretching, but sharp pain during practice or severe soreness afterward signals you pushed too hard. Back off intensity and focus on your breath, flexibility comes from relaxation, not force.
Hold each stretch for 20 to 30 seconds when you’re starting out. This duration allows your muscles to relax into the pose without triggering a protective tightening response. As you gain experience over several weeks, you can extend holds to 45 or 60 seconds for deeper releases, but rushing into longer holds won’t speed up your progress.
Men and women do tend to progress differently due to structural and hormonal factors. Women generally have greater natural hip flexibility and joint mobility, while men often have tighter hamstrings and hips but may find upper body poses easier. These are broad patterns, not rules, your individual body matters more than gender-based expectations, and both benefit equally from consistent practice.
If you can’t do a pose at all, use a modification or prop without hesitation. Can’t reach your toes in a forward fold? Bend your knees or use a strap around your feet. Tight hips preventing Butterfly Pose? Sit on a block to elevate your pelvis. Every advanced practitioner started exactly where you are, and modifications aren’t cheating, they’re the intelligent path to eventually accessing the full expression of each pose.
Building flexibility through yoga is within reach for every beginner, no matter how tight your muscles feel today. You don’t need to touch your toes on day one or contort into advanced poses to benefit from this practice. The routine outlined above gives you a practical starting point that works with your body, not against it.
Commit to showing up on your mat three to four times per week, even if it’s just for twenty minutes. Consistency beats intensity every time when developing flexibility. Some days you’ll feel noticeably looser, others you’ll feel stiff, and both are normal parts of the journey. Trust that your body is adapting with each session, even when progress feels invisible.
Remember that yoga is one component of your overall wellness strategy. Support your flexibility work by staying hydrated throughout the day, eating foods rich in nutrients that nourish your joints and connective tissue, and building in rest days so your muscles can recover. If you’re balancing yoga with other fitness goals, pair it with a complementary workout routine that builds strength alongside flexibility.
This is about sustainable self-improvement, not overnight transformation. You’re investing in a more mobile, resilient version of yourself that will serve you for years to come. Roll out your mat, take that first breath, and begin.
