
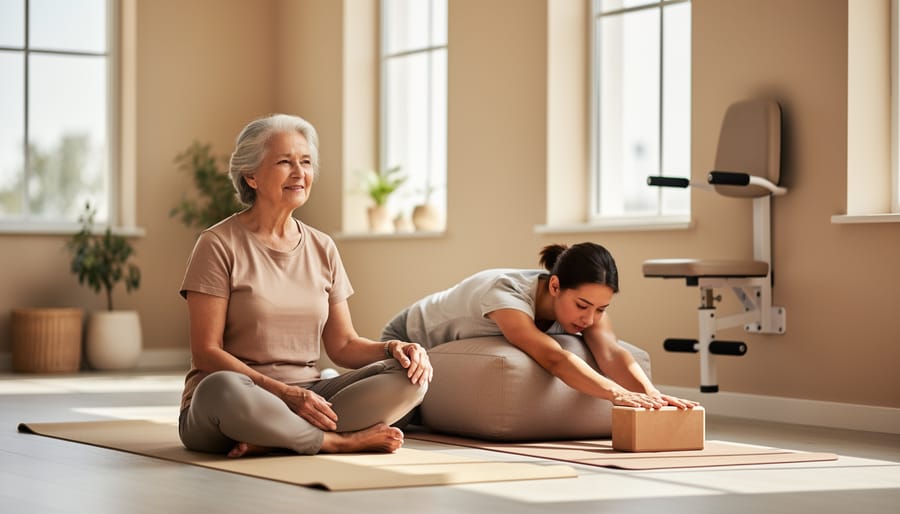
Starting yoga as a beginner or senior takes about 15 to 20 minutes per session, requires no prior experience, and focuses on gentle stretches, basic breathing techniques, and modified poses that build strength and flexibility safely. You’ll use a yoga mat, comfortable clothing, and optional props like blocks or a chair to support your practice while reducing injury risk.
The beauty of yoga lies in its adaptability. Whether you’re 60 or brand new to exercise, the practice meets you exactly where you are. You don’t need to touch your toes, balance on one leg, or twist into pretzel shapes to benefit. The real work happens when you show up consistently, move within your comfortable range, and honor what your body can do today.
Many people avoid yoga because they believe they’re too stiff, too old, or too out of shape. That thinking has it backwards. Yoga isn’t reserved for the already flexible or athletic. It’s a tool designed to help you gain mobility, strength, and balance at any age or fitness level. Beyond the physical gains, regular practice supports fitness and mental health by reducing stress, improving focus, and creating a sense of calm that carries into daily life.
This guide walks you through everything you need to begin, from choosing the right equipment and creating a safe space to mastering foundational poses with modifications tailored for your body. You’ll learn how to breathe properly, when to back off, and how to build a sustainable routine that feels encouraging rather than overwhelming.
Why Yoga Works So Well for Beginners and Seniors
Yoga stands out as an ideal practice for beginners and seniors because it meets you exactly where you are. Unlike high-impact exercises that demand baseline fitness, yoga adapts to your current abilities and grows with you. You control the intensity, the pace, and how deep you go into each pose.
The low-impact nature protects your joints while still building strength. Every movement flows smoothly without the jarring stress of running or jumping. Chair yoga for seniors offers an even gentler entry point, using a sturdy chair for support during poses that might otherwise feel challenging.
Research confirms what many practitioners experience firsthand. Studies show that yoga improves balance in elderly participants, reducing fall risk and increasing confidence in daily activities. Better balance means navigating stairs, reaching for items, and moving through your home with greater ease.
Joint health improves through gentle movement that lubricates cartilage and maintains range of motion. Regular practice keeps hips, knees, and shoulders mobile without the wear and tear of repetitive high-impact activities. You’re working with your body, not against it.
The mental benefits match the physical ones. Evidence demonstrates that yoga reduces stress through breath control and mindful movement. That calm focus carries into your daily life, improving sleep quality and emotional resilience.
Perhaps most importantly, yoga builds confidence in your body’s capabilities. You’re not competing with anyone or trying to match an instructor’s advanced form. Each small improvement, whether touching your knees instead of your toes or holding a pose three seconds longer, becomes a genuine victory. That growing trust in yourself transforms how you approach not just yoga, but life.
What You Need to Get Started
One of the most appealing aspects of starting yoga as a beginner or senior is how little you actually need to begin. Unlike many fitness activities that require expensive equipment or gym memberships, yoga can start with just your body and a small space in your living room.
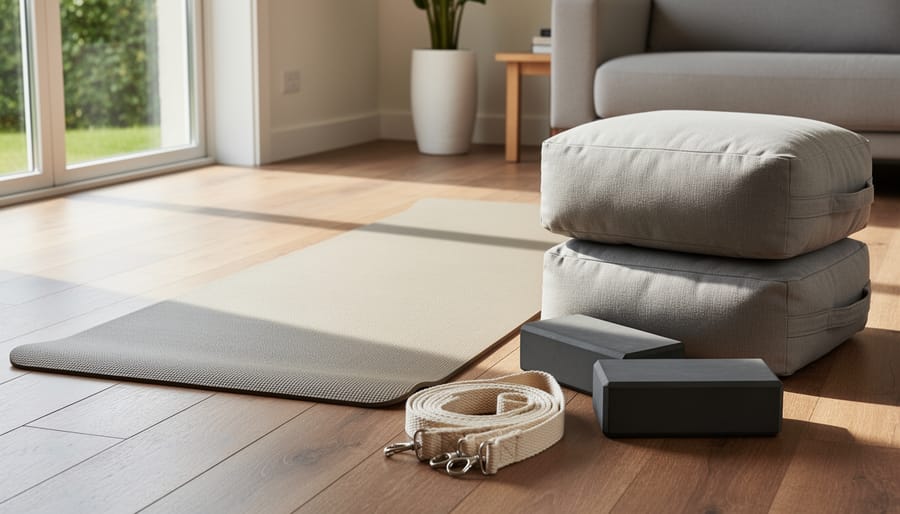
Your most important investment is a quality yoga mat. Look for one with extra thickness (at least 6mm) and a non-slip surface that provides cushioning for joints while preventing slips during poses. If you have balance concerns, a mat with texture or a sticky surface gives you more stability. You can find excellent options for $30-50 that will last years.
Comfortable clothing matters more than you might think. Choose stretchy, breathable fabrics that move with you without being restrictive. Avoid loose shirts that will flip over your head in certain poses. Fitted or semi-fitted tops work best, along with yoga pants or leggings with a comfortable waistband. Many beginners start with what they already own: athletic shorts and a t-shirt work perfectly fine.
Here’s what separates essential items from nice-to-have props:
- Essential: Yoga mat with good grip and cushioning
- Essential: Comfortable, non-restrictive clothing
- Highly recommended: Two yoga blocks for support and balance assistance
- Highly recommended: Sturdy chair for modified poses
- Nice to have: Yoga strap for gentle stretching
- Nice to have: Bolster or firm pillows for restorative poses
- Optional: Blanket for warmth during relaxation
Props aren’t luxuries for seniors and beginners, they’re tools that make poses accessible and safe. Blocks bring the floor closer to you, straps extend your reach, and chairs provide stability. A basic prop set costs $40-60 and opens up hundreds of pose variations.
Creating your practice space requires nothing fancy. Clear a area roughly 6 feet by 3 feet where you won’t bump furniture. Good lighting helps you see your alignment, and a mirror (though optional) lets you check your form. Keep your props within arm’s reach so you don’t have to break your flow hunting for a block mid-practice.
Before you move through your first warm up steps gather everything in advance. Starting with the right setup from day one builds confidence and lets you focus on learning rather than struggling with inadequate equipment.
Safety First: Important Considerations Before You Begin
Before you roll out your first mat, a honest conversation with your doctor makes all the difference, especially if you manage any ongoing health conditions or have not exercised regularly in recent months. Most physicians encourage yoga for older adults, but they can flag specific movements to avoid and help you prepare your body safely based on your medical history.
Understanding your own limits is not about what you cannot do, it is about practicing smart. Your body will send signals during each pose: mild muscle engagement and gentle stretching feel productive, like a good challenge. Sharp pain, shooting sensations, or anything that makes you hold your breath means you have pushed too far. Dial back the depth of the pose or skip it entirely. There is no prize for forcing yourself into positions that do not serve you.
If you live with arthritis, focus on gentle movement rather than deep holds. Yoga can actually ease joint stiffness when you work within a comfortable range, but gripping or straining inflamed joints will backfire. Props like blocks bring the floor closer to you, eliminating the need to overextend.
Osteoporosis requires extra care with forward bends and twisting motions, which can stress the spine. Stick with neutral spine positions and weight-bearing poses that build bone density safely, like modified Warrior poses with a chair for support.
Balance challenges call for a chair, wall, or sturdy countertop within arm’s reach during standing poses. You are still building strength and coordination, the support simply gives you confidence while your body adapts.
High blood pressure means avoiding inverted poses where your head drops below your heart, and moving slowly between positions to prevent sudden blood pressure changes. Keep your breathing steady and never hold your breath during effort.
Listen when your body asks for a break. Feeling tired after practice is normal; feeling depleted or in pain the next day means you overdid it. Scale back next time. Progress in yoga is not linear, and some days your body needs gentler work than others. That is not failure, that is wisdom.
Step-by-Step: Your First Yoga Practice
Step 1: Begin with Breathing and Centering
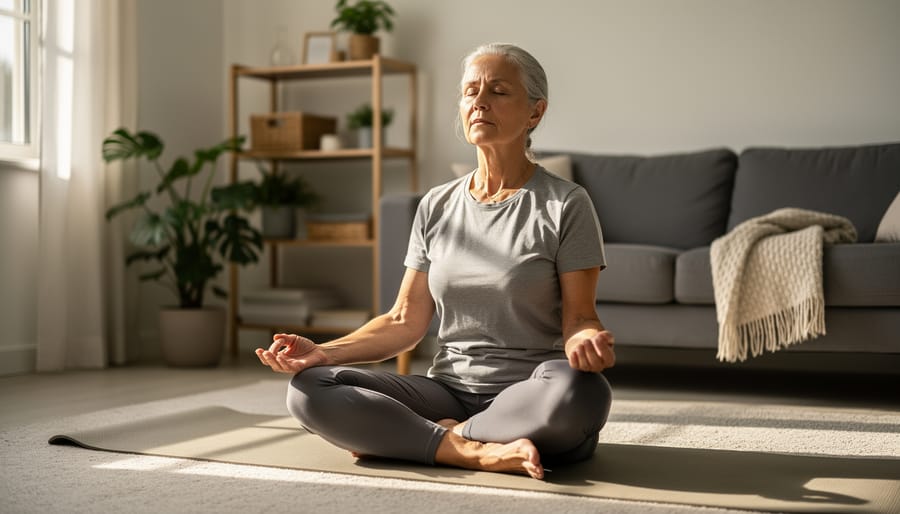
Settle into a comfortable seated position, either on your mat with crossed legs or in a sturdy chair with your feet flat on the floor. Rest your hands gently on your knees or in your lap, and let your shoulders drop away from your ears. Close your eyes or soften your gaze downward.
Begin by simply noticing your breath without trying to change it. Feel the air moving in through your nose and out again. After a few natural breaths, start to deepen the inhale slowly through your nose for a count of four, then exhale through your nose for a count of four. If counting feels stressful, just breathe at a comfortable rhythm that feels smooth and steady.
As you continue breathing, set a simple intention for your practice. This might be something like “I’m here to take care of my body” or “I’m building strength gently.” Your intention doesn’t need to be profound; it just anchors your attention and reminds you why you’ve shown up today.
Spend three to five minutes with this breathing and centering. If your mind wanders to your to-do list or worries, that’s completely normal. Gently guide your attention back to the sensation of breathing and the quiet space you’ve created for yourself.
Step 2: Gentle Warm-Up Movements
Start seated comfortably in a sturdy chair with your feet flat on the floor, hip-width apart. Begin with gentle neck rolls: slowly drop your right ear toward your right shoulder, then roll your chin down to your chest, and continue the circle to the left shoulder. Complete three full circles in each direction, moving only as far as feels comfortable. If you feel any pinching or sharp pain, reduce the range of motion.
Next, lift your shoulders up toward your ears, then roll them back and down in smooth circles. Make five backward circles, then reverse direction for five forward rolls. This releases tension many of us carry in the upper back and shoulders.
For seated spinal twists, place your right hand on the outside of your left knee and your left hand on the chair behind you. On an inhale, sit taller; on your exhale, gently twist to the left, looking over your left shoulder. Hold for three breaths, return to center, then repeat on the other side. Never force the twist, let it deepen naturally with each exhale.
Finish by pointing and flexing your feet several times, then making slow ankle circles in both directions. These small movements warm the joints and improve circulation before you move into standing poses.
Step 3: Foundational Poses with Modifications
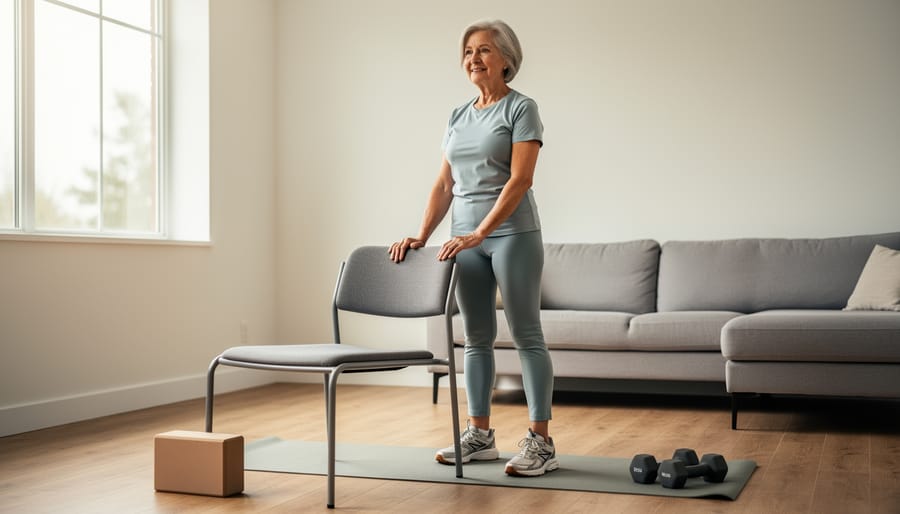
Now that you’re warmed up and breathing steadily, it’s time to move through the core poses that will build your strength, balance and flexibility. Each of these foundational movements includes modifications specifically designed for older adults and newcomers, so you can practice safely while still gaining all the benefits.
Mountain Pose (Tadasana) establishes proper alignment and balance. Stand with feet hip-width apart, distributing weight evenly across both feet. Engage your thighs gently, lengthen your spine, and let your arms hang naturally at your sides with palms facing forward. If balance feels uncertain, stand near a wall or chair back for support. This seemingly simple pose teaches body awareness and improves posture, seniors often notice reduced back pain after practicing it regularly.
Supported Chair Pose (Utkatasana) builds leg strength without strain. Position a sturdy chair directly behind you. Shift your weight back as if sitting down, lowering only halfway to the chair seat while keeping your knees behind your toes. Extend your arms forward for balance or rest your hands on your thighs. If this feels too challenging, actually sit in the chair, then practice standing up and lowering back down with control, this alone strengthens the legs significantly.
Cat-Cow Pose (Marjaryasana-Bitilasana) increases spinal flexibility. Start on hands and knees with a folded blanket under your knees for cushioning. As you inhale, gently arch your back and lift your gaze (Cow). As you exhale, round your spine and tuck your chin (Cat). Move slowly between these positions, letting your breath guide the rhythm. For arthritic wrists, try this pose while seated, placing hands on knees and creating the same spinal movements.
- Mountain Pose: Stand 30-60 seconds, focusing on alignment and steady breathing
- Supported Chair Pose: Hold 10-15 seconds, repeat 3-5 times with rest between
- Cat-Cow Flow: Continue 5-8 breath cycles, moving gently with each inhale and exhale
- Child’s Pose: Rest 30-90 seconds, adjusting props as needed for comfort
- Modified Downward Dog: Hold 15-30 seconds at the wall, breathing steadily
- Warrior I with Chair: Hold 20-30 seconds per side, keeping back heel lifted if needed
Child’s Pose (Balasana) offers gentle rest and hip opening. Kneel with knees wide apart and sit back toward your heels, extending arms forward on the floor. If your hips don’t reach your heels comfortably, place a folded blanket or bolster between your thighs and calves for support. You can also rest your forehead on stacked fists or a yoga block rather than reaching all the way to the floor.
Modified Downward Dog can be done at a wall rather than on the floor. Stand arm’s length from a wall, place your palms flat against it at shoulder height, then walk your feet back until your body forms an L-shape. Keep a slight bend in your knees and press your hips back. This version gives you the shoulder opening and hamstring stretch without bearing weight on your wrists or requiring the flexibility of the traditional pose.
Warrior I with Chair Support (Virabhadrasana I) develops leg strength and balance. Stand facing your chair, holding the back for support. Step your left foot back about three feet, turning the toes out slightly. Bend your right knee over your ankle while keeping your left leg straight. Lift your chest and, if stable, release one hand from the chair. Hold, then switch sides. The chair lets you work on the leg strength and alignment without worrying about toppling over.
Step 4: Cool Down and Final Relaxation
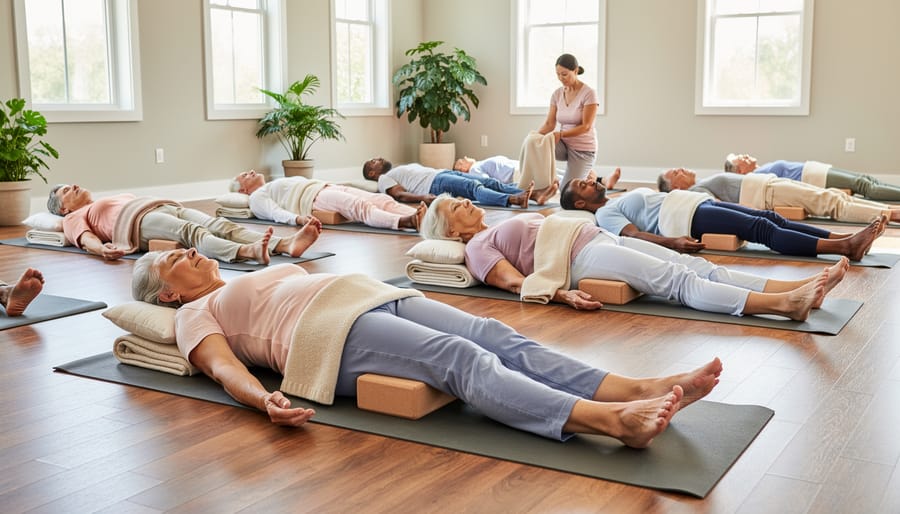
After your warm-up and foundational poses, cooling down properly helps your body transition back to rest while locking in the benefits of your practice. This final phase takes 5-7 minutes and is just as important as the active portion.
Start with gentle seated stretches. Sit comfortably and slowly stretch one leg forward, reaching toward your toes without forcing. Hold for three breaths, then switch sides. Next, bring both legs out in a comfortable V-shape and gently lean forward from your hips, keeping your back straight. These stretches release any remaining tension in your legs and lower back.
Now transition to Savasana, the final resting pose. Lie on your back with your legs extended and arms at your sides, palms facing up. Place a folded blanket under your head and a bolster or rolled towel under your knees to support your lower back. If lying flat is uncomfortable, elevate your upper body with pillows or remain seated in a chair with your feet flat on the floor.
Close your eyes and focus on your breath. Notice how your belly rises and falls naturally. Scan your body from toes to head, consciously releasing any lingering tightness. Stay here for 3-5 minutes, allowing your nervous system to fully relax. This quiet time reduces stress and helps your body absorb all the work you’ve done.
How to Know You’re Doing It Right
You’ll know you’re practicing yoga safely and effectively when your body feels challenged but not strained during poses, and you experience a pleasant sense of calm and release afterward rather than sharp pain or exhaustion. During practice, look for gentle muscle engagement, steady breathing, and the ability to hold poses for 5-8 breaths without shaking excessively or holding your breath.
Here are positive indicators that your practice is safe and effective:
- You feel energized rather than depleted after each session
- Your breathing remains steady and controlled throughout poses
- You notice warmth in working muscles without sharp or shooting pain
- You can return to a neutral position comfortably after each pose
- Your balance gradually improves, even if progress feels slow
- You sleep better and wake with less stiffness
In your first two weeks, expect to feel muscles you forgot existed and some mild soreness afterward, similar to taking a long walk. By weeks three and four, you’ll likely notice everyday movements becoming easier: reaching overhead, bending to tie shoes, or standing from a chair. Many beginners report better posture and reduced lower back tension within the first month.
Track your progress by noting how long you can comfortably hold poses, how many times you need to rest during a session, and which modifications you still require. Take photos monthly if you like, but pay more attention to functional improvements like picking up grandchildren with less effort or gardening without next-day stiffness. Many practitioners find that combining yoga with other women over 40 routines creates well-rounded fitness results.
Stay at your current level until poses feel genuinely easier and you can move through your practice without frequent breaks. Advancing too quickly invites injury, while staying patient builds a sustainable foundation.
Common Questions About Starting Yoga Later in Life
I’m too stiff to do yoga, should I even try?
Stiffness is actually one of the best reasons to start yoga, not a barrier. Flexibility develops gradually through consistent gentle practice, and every pose can be modified to meet you exactly where you are today.
How often should I practice yoga as a beginner?
Start with 2-3 sessions per week, even if they’re just 15-20 minutes each. This frequency allows your body to adapt while avoiding overuse, and you can gradually increase duration and frequency as you build strength and confidence.
Is it better to take a class or practice at home?
Both have value. A qualified instructor can provide personalized modifications and ensure proper form, especially when you’re learning foundational poses. Once you’re comfortable with the basics, home practice offers convenience and lets you move at your own pace.
Which style of yoga is best for older beginners?
Hatha, gentle yoga, chair yoga, and restorative yoga are excellent starting points. These styles emphasize slow, controlled movements with plenty of time to understand each pose, making them ideal for building a safe foundation.
What if I can’t get down on the floor easily?
Chair yoga eliminates the need to get on the floor entirely, and you’ll still gain strength, flexibility, and balance benefits. Many community centers and senior facilities offer chair yoga specifically designed for those with mobility concerns.
When searching for classes, look for terms like “gentle,” “all levels,” “seniors welcome,” or “beginner-friendly” in the description. Don’t hesitate to contact instructors beforehand to explain any physical limitations or concerns. Most yoga teachers genuinely want to help you succeed and will appreciate knowing how to best support your practice.
If you’re practicing from online videos or apps, choose programs specifically designed for older adults rather than general beginner classes. The pacing, pose selection, and modifications will be more appropriate for your needs. Remember that yoga isn’t a performance or competition. Some days your body will feel more open than others, and that’s completely normal. The practice is about showing up consistently, listening to your body, and celebrating small improvements rather than achieving picture-perfect poses.
Starting yoga as a beginner or senior isn’t about touching your toes or mastering complex poses, it’s about showing up for yourself and honoring where your body is today. Whether you’re 55 or 85, whether you can barely reach past your knees or can comfortably fold forward, yoga meets you exactly where you are and grows with you at your own pace.
The gentle path you’ve explored in this guide proves that age and flexibility aren’t barriers to beginning a yoga practice. They’re simply your unique starting point. Every centering breath, every modified mountain pose, and every supported warrior stance builds strength, balance, and confidence one small step at a time.
Begin with just 10 minutes twice a week. Notice how your body responds. Celebrate when standing feels steadier or when reaching overhead becomes easier. Progress isn’t linear, and some days will feel harder than others, that’s completely normal and part of the journey.
Your body has carried you through decades of life. Yoga offers a way to thank it, nurture it, and keep it moving for the years ahead. Be patient with yourself, stay consistent, and remember that every expert yogi you see today was once exactly where you are now.
Ready to continue your wellness journey? Explore more evidence-based fitness guidance and healthy living resources at Fit Bodies Canada, where we believe it’s never too late to invest in your health.
